Sunday, October 23, 2011

Apple Orchard Pie

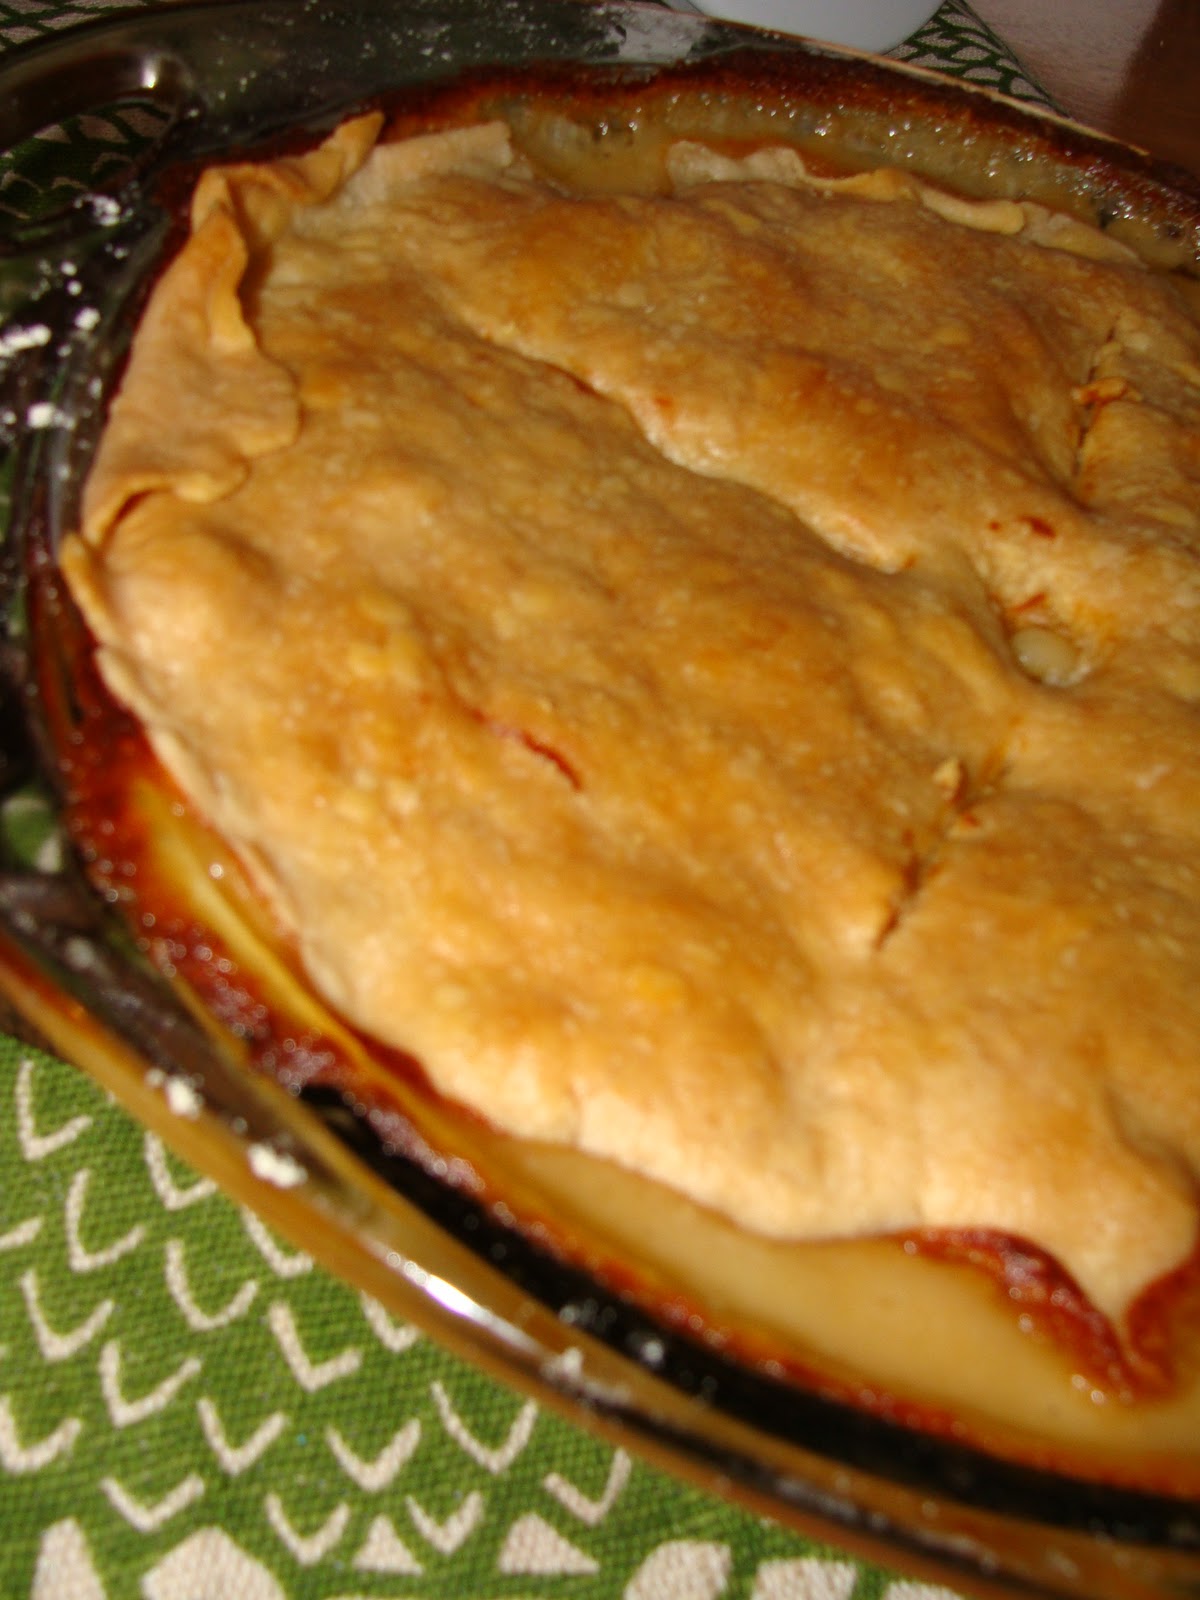
What sounds better at the end of a crisp fall day, then a nice hearty meal and a warm slice of apple pie?  The only thing that sounds better than that to me, would have to be a nice hearty meal with a warm slice of apple pie that is smothered in some vanilla bean ice cream.  And to top it off, would have to be the fact that not only is this pie here made with fresh picked apples, but fresh picked apples by my family.  And that, makes anything sound better to me.

1 pie shell from my recipe of Tonya's Special Pie Crust:  http://tonya-justcooking.blogspot.com/2010/11/tonyas-special-pie-crust.html  (balled, wrapped in saran wrap, then flattened into a hockey puck-shape and chilling for at least 20 minutes or longer in the fridge)
3 sweet Golden Delicious apples (cored and sliced thinly)
4 sweet and tart Macintosh apples (cored and sliced thinly)
1 T. of lemon juice (or juice from 1/2 of a fresh squeezed lemon)
1/2 cup + 1 T. of sugar
2 tsp. of ground cinnamon
3/4 cup of all-purpose flour
1/2 cup of light brown sugar (packed)
1/3 cup of real un-salted butter (melted)

-Preheat your oven to 400*.  Heavily flour a large circular area on your clean counter top.  Remove the chilled pie dough from the fridge, remove saran wrap, place in the center of the floured circle, lay the saran wrap (wet side down) flat out over the dough and begin rolling it (with a chilled wooden rolling pin-just toss it into your freezer for at least 10 minutes prior to using) out to about a 1/4" or so thickness.  With the saran wrap still stuck to it, lift up the edge and roll it back onto the rolling pin (to lift it safely up off the counter), then unroll it into your 9" glass pie dish (if you use a dark pan, decrease the baking time by 5-10 minutes-they cook faster).  You can then kind of use the saran wrap to lift it if it needs to be adjusted in the pan some; remove saran wrap.  In a large mixing bowl, stir together the apples and the lemon juice.  In a small bowl, combine the sugar and the cinnamon; pour over apples and stir well to coat.  Pour the coated apple slices into your prepared pie shell.  In another small mixing bowl, stir together the flour and the brown sugar with a large fork; cut in the butter until it is crumbly.  Sprinkle this mixture over the top of the pie.  Line a large baking sheet with aluminum foil and place your finished pie on top of it (it will probably bubble over while baking-resulting in the smoke alarms going off uncontrollably if you skip this part.  Trust me, I should know.  Lesson learnt.)  Take a large square of aluminum foil (maybe 10"x10" or so) fold it in 1/2 and then in 1/2 again.  Using a pair of scissors, cut a curve of the center off, so that when unfolded it it a large square with a large open circle in the center.  Lay this over the top of your pie (you want the center of the pie exposed, but the edges covered) and leave it on while baking for the first 35 minutes (or else your crust will be overcooked by the time the pie is done).  The total baking time is about 45-50 minutes.  Remove it for the last 10-15 minutes to finish off the crust.  Let it stand and cool before cutting.  Serves 8.  Enjoy!

Thursday, October 20, 2011

Scratch-Made Chicken Pot Pie

Growing up, these were a favorite amongst my family.  Pot pies that is.  And, frankly, we only had the banquet ones to go off of.  And that is so very sad.  Regardless though, we loved them and had them all the time for lunch on cold winter days.  My Mom would bake them off in the oven while us kids were out playing in the snow and I would always, always eat my crust first.  No one in my family actually ever made them by scratch, probably because they are a process alright.  But, oh they are so very much worth that process.  You cannot even imagine how delicious they are from scratch until you have had one.  Believe you me, because I, like the rest of my family, can now never go back to having them prepared any other way.

2 large boneless/ skinless chicken breasts (butterflied open)
2 T. of extra virgin olive oil
sea salt and fresh cracked pepper
1- 19oz. bag of frozen mixed vegetables (mine had corn, carrots, peas and green beans)(steamed)
10 T. of real un-salted butter
1 large red onion (chopped)
3 1/2 cups of chicken stock
2 chicken bouillon cubes
1/3 cup of heavy cream
3/4 cup of all-purpose flour
1 cup of water
1 T. of lemon juice
1 pie shell from my recipe of Tonya's Special Pie Crust:  http://tonya-justcooking.blogspot.com/2010/11/tonyas-special-pie-crust.html   (shaped as a hockey puck, wrapped in saran wrap and chilling in the fridge for at least 20-30 minutes-the longer the better)

-Preheat your oven to 375*.  Heat up the e.v.o. over a medium-high flame in a large deep saucepan.  Salt and pepper both sides of your chicken breasts and nicely brown each side in the saucepan for about 10 minutes or so (you want a dark golden/brown crusting to develop).  Once the chicken is done, plate it and set it aside to cool down (do not cut it up yet, or else all the juices will run out of it-let it cool first).  Lower your flame down to medium and toss your butter into the same pan that the chicken was in (doing it all in the same pan carries all the flavor left behind through the dish) and melt it down (do not burn your butter-that taste never goes away).  Meanwhile, in a small sauce pan, bring the chicken stock to a boil and toss in the bouillon cubes (stir this occasionally).  Once the butter is melted, throw your onions in with a little more salt and pepper (to sweat them out).  Remember to stir them often.  When the onions are nice and softened and kind of bubbling up, stir in the flour to create the rue for the sauce.  Let this slightly cook onto the onions and become a ting brown, then pour in the enhanced chicken stock and stir it in well.  Bring this to a boil and then stir in the heavy cream.  Bring this to another boil and then stir in the water.  Then again, bring this again to a boil and stir in the lemon juice. Now go ahead and chop up your cooled chicken into nice bite-sized pieces and add it into your sauce along with the steamed veggies.  Stir well to combine.  Pour the entire contents into 2 separate 9" glass pie pans (if you use a dark pie pan decrease your baking time by 5-10 minutes-they cook things a little bit faster, but I do prefer my glass Pyrex ones over anything); set them aside.  Now it's time to take your pie dough out of the fridge.  Cover your counter top with about a 1/4 cup of flour spread out evenly in a circular shape about twice the size as the crust will be (what, like 18" then I guess).  Remove the saran wrap from the hockey puck shaped pie dough, cut it in 1/2 with a knife,  place 1 hunk in the center of your floured surface (set the other to the side to use next), take that same saran wrap that was around it and place it wet side down over the top of the dough (spread out, so that as you roll out your dough, it will be under the saran wrap-just a little trick to help it from sticking to your rolling pin that I like to do).  Using a wooden rolling pin, roll out your pie dough to a 1/4" thickness or so, lift it right up with the saran wrap (it will stick to it since it is so thin) and place it over the top of the first chicken filled pie pan.  Then repeat it all for the second pie crust (making sure to start back at a heavily floured surface).  They should both fit exactly over the tops without a crust edge-if you want a crust edge then you will need to use 2 pie shells from my recipe-I was trying to conserve).  Using your index finger, poke a hole in the center of each pie crust and using a sharp knife, create some slits for venting around the hole (you can even get fancy and use festive cookie cutters for the vent holes, just make sure to do it while it is still on the counter top).  Place each pot pie on a foil-lined baking sheet (because they will bubble up and over-my did and my smoke alarms were going off for about 15 minutes....all 8 of them!) and place them side by side on the center rack of your oven.  Bake for about 1 hour or until the crust is a nice golden color.  Remove from the oven and let them stand at least 10-15 minutes before cutting and eating.  Makes 2 pot pies and serves 6-8.  Enjoy!

Wednesday, October 19, 2011

Slow-Cooker Italian Sausage and Vegetable Stew

What a wonderfully warm and hearty stew this is here.  It is so rich and flavorful thanks to the Italian sausage.  The sausage itself literally flavors the entire stew, replacing the need for any additional herbs or spices to be used.  Everything you need is right inside.  This is great on a damp chilly day along with a hunk of crusty baked bread and a good glass of red wine.  In fact it is absolutely perfect for that.

1 lb. of mild Italian sausage
1 T. of extra virgin olive oil
1 red bell pepper (julienne sliced)
1 yellow bell pepper (julienne sliced)
1 green bell pepper (julienne sliced)
1 large yellow onion (julienne sliced)
2 medium zucchini's (thickly sliced and 1/4'd)
1 package of sliced baby portabella mushrooms
sea salt and fresh cracked pepper
4 cloves of garlic (minced)
1- 14 1/2oz. can of Italian style diced tomatoes (un-drained)
2-3 T. of tomato paste

-Brown the sausage all over in a large stockpot over medium-high heat.  Once the sausage is nice and dark, add the e.v.o. and all of the veggies.  Toss on a good amount of salt and pepper to help soften and sweat them out (this develops your stock).  When the veggies are soft, add in the garlic and saute for a few more minutes.  Pour in the diced tomatoes and bring it all to a boil.  Transfer it carefully to your slow-cooker and set it to go Low and slow for 4 hours.  30 minutes prior to serving, using a large wooden spatula or spoon, chop up the sausage (it will cut just like butter) into bite-sized pieces and stir in the tomato paste.  Replace the lid and finish it off to thicken.  Serves 4.  Enjoy!

Monday, October 17, 2011

Applejack Brandy Infused Stuffed Jalapenos

My favorite appetizer at any restaurant would have to be some cream cheese stuffed jalapeno poppers.  I absolutely love them, why, but of course for the cream cheese.  It is the most perfect compliment to the hot jalapeno if you ask me.  But now, after experimenting around in my liquor pantry, I can say that mine here at home are better than any that I have had in the restaurants.  I added some diced fresh peaches into the cream cheese filling that had been soaking in some apple-infused brandy.  And just let me tell you, there couldn't be a more fitting addition to them. It adds a warm bitter sweetness that goes hand-in-hand along with the BBQ sauce on top.  Matched up with the cool creaminess of the cream cheese and the bright tart tang from my garden's jalapenos.

1/2 of a ripe peach (peeled and diced)
1 T. of brandy (I used Laird's Applejack Brandy)
6 large ripe jalapenos (sliced lengthwise in 1/2 and hollowed out like boats-no seeds left behind!)
6 oz. of cream cheese (I used Philadelphia's 1/3 Less Fat-only because I felt like I was gonna be weight conscious the day that I was at the market-yeah right)
12 slices of regular bacon (I used Oscar Meyer)
BBQ sauce (I used Kraft Original this time)

-Arrange your 2 oven racks on the top 2 levels and preheat it for a HI broil. Using a small spoon, fill and level off each pepper halve with cream cheese.  Then dot the top of it with a couple peach bits and kind of press them into the cream cheese, wrap each jalapeno mummy style with 1 piece of bacon (to keep all the good stuff inside) and then pin the loose end of the bacon to the pepper with a wooden toothpick.  Place them on a foil-lined baking sheet and onto the top rack in the oven on HI broil for 7 minutes.  Then remove the pan carefully (watch the hot grease!) and pour a small smear of BBQ sauce on top of each one.  Place them back into the oven, but now on the lower rack and broil still on HI for 5 more minutes (you want to do this to make sure you get those peppers fully cooked, but not to burn the bacon).  Serve with ranch dressing, extra BBQ sauce or just simply alone.  Enjoy!   

Thursday, October 13, 2011

French Vanilla Pumpkin Amish Friendship Bread

It was a no-brainer for me to decide how to jazz up this weeks Amish Friendship Bread.  Of course I would do a loaf of pumpkin.  I would bet that most of you even saw this one coming.


For the Starter:


2 cups of all-purpose flour
2 cups of warm water
1 package of dry yeast (DO NOT SUBSTITUTE WITH A RAPID RISE DRY YEAST-IT WILL EXPLODE!)


Directions for Starter:

Make your starter right in a large one gallon-size double zipper zip-lock bag. Just dump in all three ingredients, seal and mush very well. Do Not Refrigerate it at any point. Just leave the bag/ bags out on your kitchen counter so you do not forget about them and - NEVER- use a metal spoon or bowl at any time (use plastic or wooden).

Day 1: (Day after the date on the bag) Do nothing
Day 2: Mush the bag
Day 3: Mush the bag
Day 4: Mush the bag
Day 5: Mush the bag
Day 6: Add 1 cup sugar, 1 cup flour and 1 cup milk right into the bag, reseal it and mush it all together.
Day 7: Mush the bag
Day 8: Mush the bag
Day 9: Mush the bag
Day 10: Follow the directions below

1. Pour the starter out of the bag into a non-metal bowl (remember you should be using a wooden or a plastic spoon too).
2. Stir in 1 1/2 cups of all-purpose flour, 1 1/2 cups of sugar and 1 1/2 cups of milk (I used 2%).
3. Using a 1 cup dry ingredient measuring cup, measure out 1 cup of the batter and place into another new 1 gallon-sized plastic double zip-lock bag; repeat 3 more times to end up with 4 new starters. You can hand them out with a copy of this recipe to family and friends or freeze them by placing them into another freezer zip-lock bag and into the freezer immediately (the yeast will stay active for up to 6 months-defrost on the counter and start off again on the schedule). Just make sure to keep one back for yourself so you can retreat your family with 2 more loaves of this amazing sweet bread in 10 days :)
4. Preheat your oven to 325*.
5. Then add the following ingredients into the bowl with the remaining batter:

3 eggs (at room temperature and beaten)
1 cup of canola oil
2 tsp. of ground cinnamon
1 cup of sugar
1/2 cup of milk (again I used 2%)
1/2 tsp. of real vanilla extract
1 1/2 tsp. of baking powder
1/2 tsp. of baking soda
2 cups of all-purpose flour
1/2 tsp. of salt
1 large package of INSTANT French Vanilla Pudding mix
1 cup of canned pumpkin
1 tsp. of pumpkin pie spice

6. Grease 2 loaf pans.
7. Sprinkle the inside of the pans with a nice coating of cinnamon and sugar.
8. Pour the batter equally into the 2 loaf pans.
9. Sprinkle the top of each loaf with more cinnamon and sugar.
10. Bake at 325* for about 1 hour. If you are using a dark pan, shorten the time to 60-65 minutes. Always check to see if they are done by inserting a wooden toothpick into the center of each loaf. If it comes out dry then they are done. One starter makes 2 loaves and 4 starters. Enjoy!

Slow-Cooker Salisbury Steak

My husband and I both are big mushroom fans.  We absolutely love them.  He loves them in and on everything and I, I mostly prefer them in a brown gravy as in this recipe.  And we both especially love these particular mushrooms, the baby portabella one's.  They have a great strong flavor to them and they cook up beautifully.  They hold their shape well and turn a nice even dark color.  Basically making any dish prepared with them just absolutely gorgeous. 


1 1/2 lbs. of beef cube steaks
McCormick's Grill Mates Montreal Steak Seasoning
1/4 cup of all-purpose flour
extra virgin olive oil
1 package of sliced baby portabella mushrooms
1 large yellow onion (peeled and sliced)
1 packet of brown gravy mix
1 packet of mushroom gravy mix
1 packet of country gravy mix
3 cups of water
1 recipe of my Roasted Sweet Potato Mash

-Generously season both sides of the cube steaks.  Spread the flour out evenly on a large plate and dredge both sides of the seasoned steaks through it.  Preheat a large skillet to medium-high heat; add the e.v.o.  Once the pan and oil are nice and hot, saute' the steaks for about 4-5 minutes on each side or until they develop a nice dark brown (not burnt) crusting.  Remove them and place them into your slow-cooker and cover them with the mushrooms and the onions.  In a large mixing bowl, whisk together the gravy packets with the water, pour back into your still hot pan and bring it to a boil (this will collect all the flavor that was left behind in the pan from the steaks).  Reduce the heat and simmer while constantly stirring.  Once it has begun to thicken, remove it from the heat and pour it into the slow-cooker.  Cover with the lid and set it to go Low and slow for 8-10 hours.  Serve over mashed potatoes.  Serves 4.  Enjoy!

Wednesday, October 12, 2011

Roasted Sweet Potato Mash

Not only are sweet potatoes delicious, but they are also extremely good for you.  They are packed with more vitamins and nutrients than the average baking potato and because of that they have their own distinctly delicious flavor.  They are a wonderful compliment to most meals not just for their great flavor, but also for their beautiful color.  I particularly love to replace regular mashed potatoes with these sweet potatoes for a gorgeous pop of color and a great sweet treat right inside of dinner. 


3 large sweet potatoes (washed and dried)
2 T. of real butter
2-3 T. of heavy whipping cream
2 T. of light brown sugar (packed)
1 dash of ground nutmeg
1 pinch of salt

-Preheat your oven to 425*.  Cover a large baking sheet with foil and place on the bottom rack of your oven.  Place the sweet potatoes directly on the rack above the foil lined baking sheet (this will catch the drippings).  Roast at 425* for 1 hour.  Remove potatoes with tongs, place onto the foiled baking sheet and then place on a trivet onto the counter.  Using the tongs with your left hand, hold the potato so you can lift the skin up and off easily with a fork (this is super simple-but be careful they are wicked hot!).  Place the peeled potatoes into a large mixing bowl and add the remaining ingredients to them.  Use a potato masher or a hand mixer to mash them well.  Serves 4.  Enjoy!

Monday, October 10, 2011

Layered Cream Cheese and Pumpkin Pie

I was enjoying a cup of my Indian coffee the other morning out on the front porch, when something occurred to me.  Something that I am quite surprised that I haven't thought of sooner.  I had a sudden epiphany that I should make a new autumn dessert that was basically a combination of all of my most favorite things.  It would be a pumpkin pie of course, with a layer of cream cheese filling (to satisfy my ever increasing addiction), that was divided by a layer of pecan pie all neatly placed inside of one of my special pie crusts.   I almost fell out of my chair as I rushed to inside to the kitchen.

1 pie shell from my recipe for Tonya's Special Pie Crust:  http://tonya-justcooking.blogspot.com/2010/11/tonyas-special-pie-crust.html
8 oz. cream cheese (softened)
1/4 cup of sugar
1/2 tsp. of vanilla
1 egg (beaten)
1/4 cup of pecan chips
1 T. of light brown sugar
1 1/4 cup of canned pumpkin
3 T. of sugar
1 T. of pure honey
1 tsp. of pumpkin pie spice
1/2 tsp. of ground cinnamon
2 eggs (beaten)
1 cup of evaporated milk
cool whip and ground nutmeg for garnish

-Preheat your oven to 350*.  Cream together the cream cheese, sugar and vanilla in a large mixing bowl. Blend in the egg. Spread this mixture out evenly across the bottom of the pie shell. Then sprinkle on the pecans and the brown sugar over the top.  In a large mixing bowl, stir together the  pumpkin, sugar and spices. Beat in the eggs and milk carefully (as not to splatter your kitchen with it). Pour this over the top of the brown sugar and pecan topped cream cheese layer and spread it out with a knife. Bake at 350* for 1 hour. Cool completely, cover with saran wrap and refrigerate for at least an hour before serving.  Serve with cool whip and a sprinkle of nutmeg.  Serves 8.  Enjoy!

Sunday, October 9, 2011

Jalapeno Canned Diced Tomatoes

These jalapeno and garlic enhanced tomatoes are the perfect addition to a multitude of different meals.  I like to use them in my homemade chili and especially in my tortilla soup.  Or, basically in anything that has a Tex-Mex appeal.  They are a great way to add in a ton of rich, ripe, intense flavor.  Since the peppers are left whole and un-pierced, the tomatoes are simply flavored by them and the garlic.  They have no heat at all.  But, if the heat of the jalapeno is what you are wanting along with the flavor, just pierce the pepper to let the seeds do their work.  Then you will have some zesty jalapeno canned diced tomatoes.  To each his own is what I always say.

8 cups of ripe red tomatoes (washed and diced)
4 fresh ripe jalapeno peppers (left whole and unpierced)
4 large garlic cloves (peeled and sliced in 1/2)
4 pint-sized mason jars with rims and lids

-Start your large canning stockpot with water to boil (this takes a while) with the lid on. Once your water is boiling in your canning stockpot, submerge your clean jars, lids and rings into the water and recover with the lid. Boil for 10 minutes to sterilize them, but remember to start timing it once the water returns to a boil. Carefully-using special canning tongs only-remove jars (upright), lids and rings and place onto a towel covered cutting board (so you don't damage your counter tops). Replace the lid back onto the pot to return it back to a boil and maintain that boil. Go ahead and start filling each of the jars with about 2 cups of tomatoes, 1 jalapeno and 2 cloves of garlic (making sure that everything is below the bottom lip of the jar top (this is the 1/4" of 'headspace' required to be left void at the top of the jar, if you do not do this they will explode-seriously). Wipe the tops well with a clean damp rag and very tightly fit on the lids with the rings. Using the canning tongs again, place jars back into the rapidly boiling canning stockpot, along with replacing the lid, to process for 35 minutes. Remove the jars with the canning tongs and place UPSIDE DOWN back onto your towel lined cutting board. Allow jars to cool for about an hour or so, then flip them over to stand upright. Either your lids should already have 'popped' to seal or they will do so when they are flipped at this point. If any of your lids are not popped inward, then somewhere there was a mistake made. These un-popped jars are just fine to eat, but must be refrigerated immediately and eaten within 3 weeks. Otherwise, properly sealed jars may be kept in a cool, dry, dark place like a cabinet or pantry for up to 1 year. Once opened, again they must be refrigerated and eaten within 3 weeks. Makes 4 pint jars. Enjoy!

Bundled Enchiladas

Sometimes I get a little bit tired of the only reacurring dish at our home, tacos.  Not that I am actually tired of them, I love them and have to make them at least twice a month or so, but I just get a little bit tired of them always being so typical.  Typical meat on a shell with the same old fixings.  So in total Tonya improvisation, I decided to try something a little out of my comfort zone and make these enchiladas.  Which by the way, I have never made or even read a recipe on what exactly they are made with.  So these are based on what I had on hand at home to use.  I had already defrosted 1 pound of frozen already-made taco meat (leftover from my son's party a few months ago), so I knew that they would just have to stem from there.  And when it comes to Mexican food, refried beans is a no-brainer constant for me.  I just love them in, on and with anything and especially this particular type with bits of jalapenos already in them.  The addition of the cheese was a given, but the mayonaisse, that was a total shot in the dark.  But, thankfully I am an expert with a gun, and this was just as well aimed.  The meat mixture became thick, and hearty almost like a spread.  It gave it great substance and flavor.  And the use of the canned cream of chicken, well that was a last resort.  Because I had nothing else basically to use for the tops of them to keep them moist while baking.  And what a great idea that was.  It kept them super basic, easy and from drying out.   Sometimes cheating is still winning.

1 lb. of 80/20 ground beef
1 packet of taco seasoning (I used Ortega this time)
3/4 cup of water
3 T. of mayonnaise
2 cups of shredded taco cheese (divided)
1- 16oz. can of refried beans with jalapenos
2- 10 count packages of taco sized tortilla shells
1- 10 3/4oz. can of cream of chicken soup
1 cup of sour cream
1 key lime (because I had them, or you can use 1/2 a regular lime)
chopped grape tomatoes
sliced black olives
sliced pickled jalapenos

-Preheat your oven to 375*.  Brown the ground beef in a large skillet over a medium-high heat, drain off the grease and stir in the water and the taco seasoning packet.  Bring this to a boil and stir in the mayonnaise and then stir in 1 cup of the shredded cheese.  Once it is thoroughly combined, reduce the heat and simmer.  Meanwhile, in a small saucepan on low-medium heat, warm up the refried beans (remember to constantly be stirring them).  Then over a low flame with no pan, warm up the tortillas, 1 by 1, (I know there are many other easier ways to do this, but this is just the way I've always done it) about 15-20 seconds on each side.  Now we are ready to assemble the enchiladas.  Begin by spreading about a teaspoon of the beans in a medium-sized circle in the center of the warm tortilla.  Follow with a heaping tablespoon of the meat mixture, left in a pile at the center, and then fold over the top and bottom sides then the left and right sides, creating an enclosed bundle.  Place seam sides down in the first of two greased 9"x13" baking dishes.  Follow suit with the remaining ingredients ending with about 20 bundles between the 2 pans.  Then just place about 1 large tablespoon of the cream of chicken soup on top of each bundle and sprinkle the tops of them with the remaining 1 cup of shredded cheese.  Then bake them off at 375* for 20-25 minutes or until they are heated through and the cheese is melted on the tops.  Meanwhile in a small bowl, stir together the sour cream and the lime juice, cover and refrigerate until ready to use.  Once they are done baking, plate them with a dollop of lime-infused sour cream, a spoonful of tomatoes, a sprinkling of black olives and a few jalapenos.  Serves 6 or more.  Enjoy!

Thursday, October 6, 2011

Amish Friendship Bread

Nobody really knows exactly who made up the original recipe.  Except that it originated with the Amish people and has been altered, added to and changed as it has been handed on along the way.  Most say that it started from them and that they are the only ones that know how to make the 'starter'.  Well, those 'most' must not know about this wonderful little thing called the internet.  And thankfully for it, I have been able to get the original base of the recipe, how to start the 'starter'.  And now I am giving it to all of you. 

For the Starter:

2 cups of all-purpose flour
2 cups of warm water
1 package of dry yeast (DO NOT SUBSTITUTE WITH A RAPID RISE DRY YEAST-IT WILL EXPLODE!)

Directions for Starter:

Make your starter right in a large one gallon-size double zipper zip-lock bag. Just dump in all three ingredients, seal and mush very well.  Do Not Refrigerate it at any point.  Label the outside of the bag with the current date using a sharpie marker or permanent pen.  Just leave the bag/ bags out on your kitchen counter so you do not forget about them and - NEVER- use a metal spoon or bowl at any time (use plastic or wooden). 
Day 1:  (Day after the date on the bag) Do nothing
Day 2:  Mush the bag
Day 3:  Mush the bag
Day 4:  Mush the bag
Day 5:  Mush the bag
Day 6:   Add 1 cup sugar, 1 cup flour and 1 cup milk right into the bag, reseal it and mush it all together.
Day 7:  Mush the bag
Day 8:  Mush the bag
Day 9:  Mush the bag
Day 10:  Follow the directions below

     1.  Pour the starter out of the bag into a non-metal bowl (remember you should be using a wooden   or a plastic spoon too).
     2.  Stir in 1 1/2 cups of all-purpose flour, 1 1/2 cups of sugar and 1 1/2 cups of milk (I used 2%).
     3.  Using a 1 cup dry ingredient measuring cup, measure out 1 cup of the batter and place into another new 1 gallon-sized plastic double zip-lock bag; repeat 3 more times to end up with 4 new starters.  You can hand them out with a copy of this recipe to family and friends or freeze them by placing them into another freezer zip-lock bag and into the freezer immediately (the yeast will stay active for up to 6 months-defrost on the counter and start off again on the schedule).  Just make sure to keep one back for yourself so you can retreat your family with 2 more loaves of this amazing sweet bread in 10 days :)
     4.  Preheat your oven to 325*.
     5.  Then add the following ingredients into the bowl with the remaining batter:

3 eggs (at room temperature and beaten)
1 cup of canola oil
2 tsp. of ground cinnamon
1 cup of sugar
1/2 cup of milk (again I used 2%)
1/2 tsp. of real vanilla extract
1 1/2 tsp. of baking powder
1/2 tsp. of baking soda
2 cups of all-purpose flour
1/2 tsp. of salt
1 large package or 2 small packages of INSTANT  Vanilla Pudding mix (or any kind you prefer, you can even split the batter once you have added in everything except the pudding mix and then use 2 different flavors for 2 separate kind of loaves.  ex:  1 banana loaf and 1 pistachio loaf)

     6.  Grease 2 loaf pans.
     7.  Sprinkle the inside of the pans with a nice coating of cinnamon and sugar.
     8.  Pour the batter equally into the 2 loaf pans. 
     9.  Sprinkle the top of each loaf with more cinnamon and sugar.
     10.  Bake at 325* for about 1 hour.  If you are using a dark pan, shorten the time to 50-55 minutes.  Always check to see if they are done by inserting a wooden toothpick into the center of each loaf.  If it comes out dry then they are done.  One starter makes 2 loaves and 4 starters.  Enjoy!

Tuesday, October 4, 2011

Pumpkin Drop Cookies

I swear to you that I see in 'pumpkin' at this time every year.  From about the end of August, because I am in such anticipation and can never wait, until about the day after Thanksgiving, I want pumpkin.  Everything I see, read or eat is a stomping ground for me to alter, change and turn it into a pumpkin something.  It's all I can even think about.  It is more than a craving, though this is what I think it starts as, but literally an obsession of mine.  And these soft little pumpkin cookies were the perfect concoction to feed my desire with today.  They are like fluffy little pumpkin pillows, sweet from the honey and warm from the spices.  Almost like pumpkin pie baked as a cookie.

1 cup of sugar
1/2 cup of real un-salted butter (softened at room temperature)
1 cup of canned pumpkin
2 eggs (at room temperature)
1 T. of honey
2 cups of all-purpose flour
2 tsp. of baking powder
a dash of salt
2 tsp. of pumpkin pie spice
1/4 cup of pecan chips
cinnamon and sugar

-Preheat your oven to 375*.  In a large mixing bowl, on medium speed, beat the sugar and the butter together until they are fluffy.  Beat in the pumpkin, eggs and the honey.  In a small mixing bowl, combine the flour, baking powder, salt and the pumpkin pie spice.  Stir this into the pumpkin mixture in 2 separate batches, making sure to fully combine it before the next addition.  Stir in the pecans.  Drop by rounded spoonfuls onto an ungreased baking stone (what I use for all my cookies) or cookie sheet.  Sprinkle them with a little bit of cinnamon and sugar, then bake for 10 minutes or just until the edges are slightly firm but not browned.  Remove from oven and transfer the cookies onto some wax paper to cool.  Makes just about 4 dozen.  Enjoy!

Homemade Beef Stew

Fall is upon us and my comfort food desires are back.  Basically because from now until about next May, I will be chilled to the bone as I like to say.  And nothing warms you up and says comfort food like a steaming hot bowl of homemade beef stew.  This is the precise definition of a stick to your ribs kind of meal.  One that warms you all the way through.  From way down inside and all the way out.  And, to be honest with you, this is a first of two for me.  A first time making it and a first time to ever even try it.  So, I thought that I would just feel my way through it and use my own way of cooking and seasoning to make it my own.  And I will be the first to say, right before my husband, that my homemade beef stew is delicious.  It was everything I was looking for.  It was warm and hearty and every bit as savory as it could be down to the very last drop.

1/4 cup of all-purpose flour
1 tsp. of dried basil
1 tsp. of dried crushed thyme
1 tsp. of garlic powder
1 1/2 lbs. of beef stew meat (pre-chunked)
2 T. of bacon grease (if I didn't have this, I would use a good e.v.o.)
1 bay leaf
1 medium vidalia sweet onion (chopped)
7 small carrots (peeled and chopped)
2 large celery stalks (chopped)
12-14 small petite red potatoes (a strip peeled horizontally off the center-leaving the top and bottom still skinned)
sea salt and fresh cracked pepper
2 T. of real un-salted butter
6 small cloves of garlic (minced)
1/2 cup of red wine (I drink sweet, so I cook the same with Lambrusco)
32 oz. of beef stock
1 tsp. of dried oregano
4 T. of cornstarch (divided and used to preference)
1 tsp. of fresh rosemary (snipped)
1-2 T. of fresh flat-leaf Italian parsley (snipped)
sour cream
1 loaf of fresh baked Vienna bread (found in your markets bakery)

-Mix together the flour, basil, thyme and garlic powder in a quart-sized ziploc bag.  Working with 6-8 piece batches, add in the stew meat to the bag, seal it and shake to coat the meat.  Meanwhile heat up your bacon grease in a large stockpot over high heat.  Drop in your seasoned flour coated stew meat and saute' for about 5 minutes or so, making sure to stir it up often to get a nice even browning (you are looking for a nice dark bark).  Then add in your onions, carrots, celery, potatoes, some salt and pepper and the butter.  Saute again for about 5-6 more minutes and toss in your garlic.   Stir in your wine next to deglaze the bottom of the pan and then follow with your beef stock.  Bring this to a nice boil, stir in the oregano, reduce the heat, cover and simmer for about 30-45 minutes (the longer the better).  Using only 1 T. of cornstarch at a time along with about a little less than a 1/4 cup of water, fork whisk together a slurry to add into the simmering stew (this will thicken it).  You can then judge and control the body of the stew (I used 4 T. for mine and even thought of going thicker still with maybe 2 more).  You can cover and simmer for later, transfer to a slow-cooker or serve at this point.  Just stir in the fresh snipped rosemary right before serving and garnish the top of each bowl with dollop of sour cream and  a sprinkle of parsley.  Serve with some soft Vienna bread and butter.  Serves 4.  Enjoy!

Game Day Taco Salad

I have literally been wowing men and their football fiend wives (no disrespect girls) with this little game day appetizer for years now.  It doesn't matter if they like me or even know me, when I walk into a game day party with not only just a platter of their favorite dip, but one done up like their favorite, most manly, most brutal sport as well, they get all excited and into it.  I almost half expect them to grunt out their approval at me.  I can almost hear my Grandma in my mind at these moments, "Can't be happier than a pig in sh*t right now."  Though even though it's always fun, it is not the only great pleasure  that I get when I make this, but I have to give credit all the way back to the memories that came with when and where this particular recipe came from.  I used to make this with one of my very best besty's, Jodi, back when we were fresh out and on our own.  This was the beginning of it all.  Trying to cook, trying to entertain and having no idea how.  These are some of my very best appetizer years.  When cheap was the only way to be.  We used to get together and do our grocery shopping, recipe planning and on occasion our eating together.  I think that is why I enjoy this beyond it just being awesome and delicious, it just makes me feel good to be reminded of us as young girls playing 'house' as women.

1- 8oz. brick of cream cheese (softened)
1- 16oz. tub of sour cream
1 packet of taco seasoning (I used Ole El Paso)
1- 2 cup package of shredded monteray jack and cheddar cheese
10-12 grape tomatoes (diced)
1 head of iceberg lettuce (torn into small thumb-sized pieces for the field)
3-5 T. of sour cream (for your yard lines and numbers)
1 can of medium-sized whole pitted black olives (cut width-wise in 1/2 for their helmets)
1 whole Greek olive or 1 pimento (for the 'football')
1-2 bags of scoops tortilla chips (I always go through about 1 1/2 bags for the dip)

-In a large mixing bowl, on medium speed, mix together the cream cheese, 2 cups of sour cream and the taco seasoning packet until smooth (if your cream cheese is not fully softened, there will be lumps that won't mix out).  Spread this mixture out evenly on a large square or rectangular platter (if it has a little depth to it like mine did) or in a 9"x13" cake pan (a cookie sheet would work if you are serving it immediately-otherwise saran wrap will mess up your yard lines since it will be laying flat across it).  Then just evenly spread out a layer of  cheese over it, then the tomatoes and lastly an even layer of the lettuce (by tearing the lettuce you can really cover the dip making it look like grass, if you chop the lettuce it tends to curl and then it shows the stuff underneath it).  Next you are ready to create your yard lines across your field of lettuce.  You place your 3-5 T. of sour cream into a ziploc sandwich baggie, snip the corner a little bit, twist the top zippered end tightly towards the sour cream to pressure it down and out with you guiding it like a pastry bag.  You may want to not follow my actual photo, as I know nothing of football and basically assumed that this is how the field looks in Tonya's World.  You can pipe out as many sour cream lard lines with coordinating field numbers as you like. Then you take your 1/2'd black olives, only wanting to use the bottom end 1/2, not the open hole 1/2's-discard them or save them for a later use like on some tacos.  Take these little bottom end olive 1/2's and place them cut-side down on the field in a formation on either sides of the yard lines.  I even put some on the 'sidelines' for my bench warmers.  Lastly, for the football, take either your Greek olive or your pimento (pimento looks the best but I was plum out) and place it on the center line in between your 2 'teams'.  And viola'!  You have a football game taco dip.  Serve with scoopable tortilla chips.  Serves many.